Roofing Contractor
Roofing

What Does a Roofing Contractor Do?

Colorado Springs Roofing Contractor are construction professionals who specialize in the roofs of residential and commercial buildings. They can also offer other home improvement services, like siding and gutters.Roofing Contractor

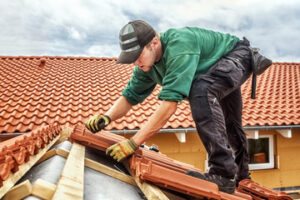
Getting the best value for your money is important when shopping around for a roofing company. It’s often best to avoid choosing the lowest bidder, as that can lead to rushed and subpar work.

Roofing contractors help homeowners with the installation of a roof covering. They are able to assess the nature of each job and determine how much material is needed, what accessories may be necessary, and how long the work should take. They are also able to help shepherd the project through the required inspections and permitting processes. A contractor can help the homeowner understand and negotiate the various terms of a contract, including deposit requirements, payment schedules, and scope of work details.

A roofing contractor can install a variety of roof coverings, from asphalt shingles to metal roofing. They can also install gutters and downspouts and repair or replace siding on a home. They can also handle other exterior home improvements, such as window and door installations. They can perform this type of work themselves, or they may subcontract the work to other construction professionals.

Once the homeowner has selected a contractor and signed a contract, the roofing contractor will begin the installation process. They will remove existing shingles and then apply an underlayment, which is the base layer for the new roofing system. The underlayment is run along the edges of the roof, over the ice and water barrier and drip edge, and fastened with cap nails that are closer together at the edge of the roof and more spread out towards the middle.

The shingle layers are then installed, starting with the bottom row and working up to the ridge line. The shingles are then cut to size and placed on the underlayment, with each shingle being nailed into place with two nails in the top row and three nails in each of the other rows. Depending on the roof, the contractor will then install any necessary vents, flashing, drip edges, or other components. The shingle layers are then covered with a sealant to protect the underlayment and finish off the roof.

Repair

Re-roofing is the quickest and most affordable way to restore the appearance of an existing roof. It is also a more permanent solution than replacing the entire roof covering. However, re-roofing doesn’t provide as much protection from weather-related damage as a complete roof replacement.

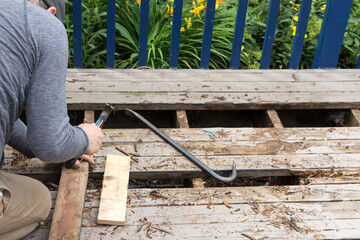
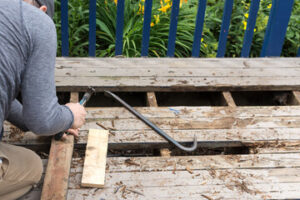
Before you can make any repairs to your roof, you must first inspect it thoroughly. Get into your attic or crawl space and take a look around. Examine for damp stains, water leaking, and other signs of roof damage. If you spot any problems, don’t hesitate to contact a roofing contractor for professional advice and service. They are trained to inspect, repair, and maintain all types of roofs for residential and commercial properties. They use specialized tools to conduct detailed inspections and make necessary repairs.

Maintenance

A roofing contractor performs work to maintain the integrity of a roof covering. This includes the repair, replacement, and maintenance of materials such as asphalt, pitch, tar, felt fabric, glass fabric, or urethane foam to prevent water or its derivatives, compounds, or solids from penetrating protective structures or gaining access to material or space beyond such structures. Roofing contractors may also perform routine inspections of roofs to detect and address minor damage before it becomes more serious. They can also help shepherd construction projects through the permitting and inspection phases. They may even take on some managerial duties, such as hiring and managing other roofing contractors or subcontractors to perform certain aspects of the re-roofing job.

Roofing contractors can also assist in the installation of gutters and downspouts, as well as siding, windows, doors, and insulation.

Inspection

A roofing contractor installs products and repairs surfaces that seal, waterproof, and weatherproof structures to prevent water or other liquids, gases, or solids from penetrating the protection and gaining access to the material or space beyond. They may use asphaltum, pitch, tar, felt, glass fabric, urethane foam, or other roofing, waterproofing, and weatherproofing materials (and/or combinations of these).

A roof inspection is an examination of the condition of a home’s roof covering to identify mold, structural issues, wear from natural elements, or more. The roofing contractor will also examine the grading of the property to ensure that rainwater, snow, and floodwaters are directed away from the house or towards a drain.

In addition to looking at the roof, an inspector will look at the siding, windows, and doors to make sure they open and close as they should. They will also check the electrical, plumbing, and HVAC systems to make sure they are functioning properly. If you’re selling your home, it’s a good idea to have an inspection done before putting it on the market so you can address any issues found by the inspector.

A quality home inspector will take the time to look at every part of the property and explain their findings clearly. You can find a qualified home inspector by asking friends and neighbors for recommendations or doing an online search. It’s also a good idea to check an inspector’s references and credentials before hiring them. You can do this by contacting previous clients or the Better Business Bureau.

Deck Repair
Deck Repair Services

Common Reasons for Deck Repair

While routine maintenance can prevent many problems, major damage to a deck often requires structural repair. This might be due to storm damage, a fallen tree limb, or serious rot.Deck Repair

Joist rot is very expensive to repair because it can affect the entire deck structure. It’s a good idea to have a professional conduct a thorough inspection and provide an estimate.

Creaking, squeaky stairs can be very annoying. Wood stairs work loose over time, and that looseness causes the various parts to rub together and make noise when stepped upon. Stairs are also susceptible to rot and need to be repaired or replaced as needed.

Squeaks can occur when the tread-riser connection rubs against a baluster or the stringer. This usually happens when the wood shrinks and loosens the tread-and-riser connection. The squeak may disappear when a bit of lubricant is applied to the area. However, in most cases, a repairman is needed to fix the problem.

Stair newels, or banister posts, anchor the handrail and must be very secure in order to withstand routine use. When a newel becomes loose, it can be a serious safety hazard because it can cause people to lose their balance as they walk up and down the staircase. The most common way to repair a loose newel is to fasten it in place using screws or nails. This will eliminate the squeak and provide stability. It’s important to note, though, that this is a very dangerous job for a homeowner to try on their own and should always be left to a professional.

While stairs need to be tight and secure, they must also be comfortable and inviting to use. A good-quality set of stairs should allow for a smooth, controlled descent and be free from any sharp edges that could be uncomfortable or cause injuries. Stairs are also often painted or stained to cover marks and refresh the look of an older set.

It’s preferable to access a staircase from below in order to perform repairs, but this is not always possible because the underside of some stairs may be concealed by finished ceilings or another covering. On carpeted stairs, it’s also easier to work from above because the underside of the steps is exposed.

The most common squeaks on a staircase come from the riser-and-tread connections. Older stairs were doweled and mortised into the floor framing, but modern mass-produced stairways are typically glued to the stringers. To close gaps between the stair stringers and treads, start by cleaning out the gap to remove any wood splinters or nails that have worked loose. Next, drill a 3/8-inch hole through the block and countersink a hole large enough to accept the carriage bolt head at the top of the stringer, where it will terminate.

Railings

When wooden railings begin to rot or become damaged, they create a safety risk for people using the deck. Children can fall through the gap in the railing, and elderly individuals and those with mobility issues may be injured when they lose their balance. Fortunately, it is fairly easy to repair damaged railings without requiring an expensive replacement. The first step is to check for any moisture penetration in the wood and remove any moss or weeds from the bottom of the railing.

Moisture penetration can cause the wood to warp, which can weaken the railing and increase the likelihood of it buckling or breaking away from the posts. It is also important to check the railing for any areas of damage, such as splits or cracks, that need to be repaired. If there are any areas of looseness in the railing that need to be fixed, it is a good idea to use exterior wood glue to prevent splitting.

A few common methods for fixing a loose handrail include epoxy, duck tape, little angle brackets with tapcons (and box nails), or straps. While these methods might work temporarily, they are not durable and will not keep the handrail secure in the long term. If a railing is severely loose, it is recommended to replace the entire section of the rail.

Another issue that can affect metal railings is rust. While some people choose to leave a rustic look on their iron railings, it is a good idea to clean and repaint them regularly to prevent rust from eroding the metal.

In addition to cleaning and repainting, it is a good idea to lubricate the hardware on the railings. This can help prevent the screws and bolts from becoming stuck and causing further damage. You can find lubricating oil that is specifically designed for use on metal at most hardware stores.

While wood and metal railings are attractive, they can be dangerous for children. Glass railings are a safer alternative that provide a solid wall structure around the deck, which makes it harder for kids or pets to fall through.

Boards

A deck provides a great place to sip a glass of wine, read a book, or host friends for a summer barbeque. But this outdoor living space faces a lot of pressure from the elements, including water damage and the effects of salt or sun exposure. In addition, a deck is susceptible to insects and the natural aging of the wood. If you see signs of disrepair, such as warped boards or rotted joists, it’s time for an inspection and repairs.

Depending on your deck’s materials, you may have a variety of options for repair and replacement. Pressure-treated decks typically need sanding and regular coats of stain or sealer to prevent splintering, while cedar and redwood are more resilient and naturally water-resistant. But any wood can deteriorate with age and extensive use, and even the most durable wood needs protection from harsh weather conditions like rain and snow.

The main beam that connects your deck to your home is called the ledger board, and it’s important to keep it in good condition. If this board becomes loose, it can cause serious structural issues and damage your house. A professional will inspect the ledger board and, if necessary, crawl underneath the deck to determine its condition. If the wood has become soft or rotted, you may need to have it replaced with new lumber.

Deck boards can also become warped, causing gaps between them and creating a spongy feel underfoot. This is usually caused by the movement of water through the boards or a buildup of salt or debris from foot traffic. In most cases, warped deck boards can be straightened with a pry bar and then fastened back in place with fresh screws.

The fascia board is a wide, thin deck board that wraps around the edge of your deck or conceals the ends of the deck boards. The board can rot if it collects moisture, especially in the area where it meets the deck post. To prevent this, sand the surface and apply a wood preservative to keep it protected.

Ledger Board

Ledger board failure is the number one cause of deck collapse, so this important piece of wood deserves extra attention. Historically, this board was simply face-nailed to the rim and floor joists; more recent codes call for carriage bolts or lag screws that extend into the home frame. A staggered fastener pattern discourages the ledger from splitting and helps to ensure that joists are properly supported.

Proper flashing is also crucial; it’s usually hidden from view behind the deck but should run under and above the ledger to tie the building framing to the new deck frame. If water leaks in behind the ledger, it can rot and weaken its support.

Typically, the problem is caused by rotten joist hangers that connect the joists to your deck’s front structural beam and the ledger board. Often, you can repair this problem by removing the current hangers and replacing them with new galvanized ones. If the joists are loose, you might need to replace them altogether.

If the joists aren’t rotted but you’re concerned about excessive movement, install angle bracing under the deck to stiffen it. Typically, these are treated 2x4s running diagonally from corner to corner, but they can be constructed of other materials if you prefer. Drive 16-d galvanized nails through the bracing into each joist to secure them and prevent swaying.

If the existing ledger board is rotted, remove it and inspect the wall framing below. If rot is present, you’ll need to install a sill patch. Use a tape measure to determine the length of the opening and cut a treated 2 by 8 to match. Cut it 1/8 inch shorter than the length of the removed rotten section to allow for expansion. Fit the new sill patch over the opening, and then attach it to the ledger with angling 3-inch screws. Slide a piece of vinyl flashing over the joist ends, making sure that its lip covers the top of the ledger. Use tin snips to cut the flashing to size and nail it into place, being careful not to puncture the siding of the house below.